Many homes in the U.S. have mold growth due to water damage. If you’ve recently dealt with a leak or flooding, it’s critical to act quickly and effectively to prevent mold from becoming a serious issue. Understanding the right steps for mold remediation can save you time, money, and health risks. Let’s explore the top seven tips you need to follow to tackle this challenge efficiently.
Key Takeaways
- Act quickly to remove standing water and dry affected areas to prevent mold growth within 24 to 48 hours.
- Use dehumidifiers and fans to maintain humidity levels between 30-60% for effective drying.
- Cut out and dispose of contaminated materials like drywall and insulation to eliminate mold sources.
- Wear protective gear during mold removal to ensure safety from harmful spores.
- Document the remediation process with photos and notes for future reference and insurance claims.
Assess the Extent of Water Damage
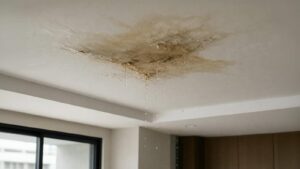
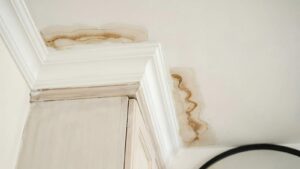
Before you can effectively tackle mold remediation, you need to evaluate the extent of water damage in your space. Start by identifying the water source—whether it’s a leaky roof, burst pipe, or flooding. This will help you understand the scale of the problem.
Next, conduct a thorough damage evaluation. Inspect walls, ceilings, and flooring for discoloration, warping, or dampness, as these indicators reveal hidden moisture levels. Use a moisture meter for precise readings, ensuring you don’t overlook any affected areas.
Pay special attention to insulation and behind appliances, as these spots often harbor unseen damage. Document your findings with photos and notes to aid in your remediation plan.
Act Quickly to Prevent Mold Growth
Once you’ve assessed the extent of water damage, acting quickly is vital to prevent mold growth.
Mold can begin to develop within 24 to 48 hours after water exposure, making your response time critical. Implement effective mold prevention strategies immediately. Start by removing any standing water and drying affected materials, such as carpets and drywall, within that water damage timeline. Use fans and dehumidifiers to expedite the drying process.
Ensure that you ventilate the area to reduce humidity levels, as mold thrives in damp environments.
Check hidden spaces, like behind cabinets or under sinks, where moisture may linger. If you can, consider using mold-resistant products for repairs.
By following these steps, you’ll protect your property and foster a healthier living space for yourself and your loved ones.
Ensure Proper Drying Techniques
To effectively eliminate moisture and prevent mold recurrence, you need to utilize dehumidifiers properly in your work area.
Make certain to position them strategically to maximize air circulation and moisture extraction.
Additionally, ensure adequate ventilation by opening windows or using fans to promote airflow, which is essential for thorough drying.
Use Dehumidifiers Effectively
How can you maximize the effectiveness of dehumidifiers in mold remediation?
Start by adjusting your dehumidifier settings to the ideal level, typically around 30-60% humidity. This range promotes moisture control, preventing mold growth without over-drying your environment.
Position your dehumidifier in the most affected areas, ideally where water damage occurred, to target the source of excess moisture. Make sure that the unit’s air intake is unobstructed, allowing for efficient airflow.
Monitor humidity levels regularly with a hygrometer to adjust settings as needed. Remember to empty the tank frequently or use a continuous drainage option to maintain consistent dehumidification.
Ventilate Work Area
While it might seem tempting to seal off a workspace during mold remediation, proper ventilation is essential for effective drying.
To achieve this, ensure adequate air circulation by opening windows and using fans to promote fresh airflow. Stagnant air can exacerbate moisture issues and hinder the drying process, leading to mold growth.
Position fans strategically to direct airflow across wet surfaces, and consider using exhaust fans to remove humid air. Additionally, check that your dehumidifiers are functioning correctly to enhance moisture reduction.
Remove Contaminated Materials
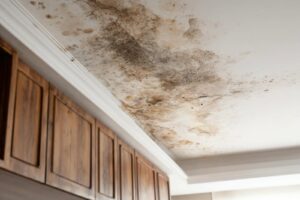
Begin by evaluating the extent of mold contamination in your home, as removing contaminated materials is vital for effective remediation.
Inspect areas where moisture has accumulated, focusing on moldy drywall and contaminated insulation. If you find drywall that’s visibly affected or crumbling, it’s imperative to cut out and dispose of those sections. Mold can penetrate deep within the material, making it impossible to fully remediate without removal.
For insulation, if it’s damp or shows signs of mold growth, it’s also best to replace it. Mold can thrive in fibrous materials, and simply cleaning them won’t suffice.
Ensure you’re wearing appropriate protective gear, including gloves and a mask, during this process. Dispose of materials in sealed bags to prevent further spread.
Use Effective Mold Removal Products
After you’ve removed contaminated materials, the next step is to use effective mold removal products to treat any remaining mold spores and prevent future growth.
Start by selecting safe cleaning products specifically designed for mold remediation. These products usually contain antimicrobial agents that kill mold spores upon contact. When applying, follow the manufacturer’s instructions carefully to ensure peak effectiveness.
Utilize various mold removal techniques, such as scrubbing surfaces with a mixture of safe cleaning products and water, or using specialized mold removal wipes for convenience.
Be sure to wear protective gear, including gloves and masks, to safeguard yourself from inhaling spores.
After treatment, allow the area to dry completely, as moisture promotes mold regrowth.
Regularly inspect treated areas for any signs of mold reappearance, and don’t hesitate to reapply your chosen products if necessary.
Your proactive approach will foster a healthier environment for you and your loved ones.
Implement Preventative Measures
To effectively prevent mold growth, you must implement proactive measures that address moisture control and ventilation.
Start by ensuring your home’s humidity levels remain below 60%. Use dehumidifiers in damp areas and regularly check areas prone to moisture, like basements and bathrooms.
Proper ventilation is essential; install exhaust fans in kitchens and bathrooms to expel humid air.
Seal any leaks in roofs, plumbing, or walls to eliminate water intrusion. Insulate pipes to prevent condensation, especially in colder months.
It’s also important to regularly clean gutters and downspouts, directing water away from your foundation.
Consider using mold-resistant products, such as paints and drywall, for added protection.
By prioritizing these mold prevention strategies, you reinforce a healthy living space for you and your family.
Taking these steps curbs mold growth and fosters a sense of safety and belonging in your environment.
Monitor for Future Mold Growth
How can you ensure that mold doesn’t return after remediation? The key lies in diligent monitoring and proactive measures.
Start by scheduling regular future inspections of the affected areas, ideally every few months. During these checks, utilize effective mold detection methods, such as moisture meters and air quality tests, to identify any signs of mold growth early.
Keep an eye on humidity levels; aim to maintain them below 60% to create an inhospitable environment for mold. If you notice any leaks or water damage, address them immediately to prevent mold from re-establishing.
Establish a partnership with a mold remediation professional for ongoing support and guidance. Their expertise can help you navigate any concerns and ascertain your home remains mold-free.
Frequently Asked Questions
How Can I Tell if Mold Is Toxic?
You can identify toxic mold by using mold identification techniques like visual inspection, air sampling, and surface testing. If you experience symptoms such as respiratory issues, skin irritation, or fatigue, consult a professional immediately.
Can I Remove Mold Myself or Hire a Professional?
You’ve got two paths: DIY mold removal can empower you, but professional services ensure safety and thoroughness. Weigh your skills against potential risks, and choose wisely to protect your health and home.
What Are the Health Effects of Mold Exposure?
Mold exposure can cause allergic reactions, triggering symptoms like sneezing and itching. It may also lead to respiratory issues, such as asthma attacks or chronic cough. If you’re sensitive, it’s essential to address mold promptly.
How Long Does Mold Remediation Typically Take?
Mold remediation typically takes 1 to 5 days, depending on factors affecting the remediation timeline like the extent of damage and environmental conditions. Understanding these variables helps you better prepare for a thorough cleanup process.
Is Mold Growth Ensured After Water Damage?
Mold growth isn’t ensured after water damage, but without effective moisture control techniques and mold prevention strategies, the risk greatly increases. Implementing these measures quickly can help protect your space and maintain a healthy environment.
Summary
In the race against mold, time is your greatest ally. By following these steps, you can effectively tackle mold remediation and protect your home from further damage. Remember, a stitch in time saves nine; addressing water damage promptly keeps mold at bay and ensures a healthier living environment. Stay vigilant, monitor your spaces, and take preventative measures to safeguard your home’s integrity. With diligence, you can win the battle against mold and create a safer, more comfortable space for you and your loved ones.