When water damage strikes, swift action is essential to minimize impact. You’ll need to assess the situation carefully, ensuring safety while identifying the source of the water. Removing standing water is just the beginning; understanding the extent of the damage and implementing effective drying techniques are important. With the right strategies in place, you can greatly expedite recovery and prevent future issues. Discover the essential steps that follow to safeguard your property effectively.
Key Takeaways
- Act quickly to remove standing water using pumps and wet vacuums to minimize damage and prevent further deterioration.
- Ensure safety by assessing electrical hazards and wearing protective gear before entering affected areas.
- Identify the source of water promptly to implement effective restoration measures and prevent future issues.
- Use industrial-grade dehumidifiers and fans to dry and dehumidify affected areas, maintaining humidity below 60% to inhibit mold growth.
- Schedule regular inspections and maintenance to detect leaks and moisture issues early, ensuring long-term protection against water damage.
Act Quickly to Minimize Damage
When water damage occurs, acting quickly is essential to minimizing its impact on your property. Start with immediate water removal to prevent further deterioration. Use pumps and wet vacuums to eliminate standing water effectively.
Next, conduct a thorough damage assessment; identify the affected areas and materials, such as drywall, flooring, and insulation. This evaluation helps prioritize your response, focusing on the most severely impacted sections first.
Document the damage with photos for insurance claims and future reference. The sooner you begin the cleanup and restoration process, the less likely you’ll face mold growth or structural issues.
Engage professionals if necessary, as they have specialized equipment and expertise to handle extensive damage safely and efficiently. Remember, swift action conserves your property and fosters a sense of community resilience, showing that you value your home and its well-being.
Ensure Safety First
Before you start any restoration work, you must assess electrical hazards to prevent shocks or fires.
It’s essential to wear protective gear, including gloves and masks, to shield yourself from contaminants and debris.
Additionally, take the time to identify any structural risks, as weakened areas can pose serious threats during the restoration process.
Assess Electrical Hazards
As you begin the water damage restoration process, evaluating electrical hazards must be your top priority to ensure safety.
Start with thorough electrical inspections to identify potential risks. Look for frayed wires, submerged outlets, or damaged circuit breakers that pose serious dangers.
Make sure you disconnect power to affected areas before proceeding; this is essential for your safety. Use a multimeter to check for live voltage and follow proper protocols for hazard identification.
Don’t attempt to handle any electrical components if you’re unsure; it’s best to consult a licensed electrician.
Wear Protective Gear
After ensuring the electrical hazards are assessed and addressed, the next step in the water damage restoration process is to prioritize personal safety by wearing appropriate protective gear.
Using the right safety equipment protects you and fosters a sense of community and responsibility among your team.
Here’s what you should wear:
Waterproof Boots: Keep your feet dry and protected from hazardous materials.
Gloves: Use heavy-duty gloves to shield your hands from contaminants.
Respirators: Protect your lungs from mold spores and airborne particles.
Protective Clothing: Wear coveralls or suits to prevent skin contact with harmful substances.
Identify Structural Risks
Identifying structural risks is vital in any water damage restoration project, as even a small oversight can lead to significant safety hazards.
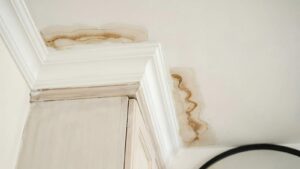
First, assess areas affected by water infiltration; this can compromise the building’s structural integrity. Look for signs of sagging ceilings, warped walls, or cracked foundations. These indicators may suggest weakening structures that require immediate attention.
It’s imperative to evaluate supporting beams and joists for water damage, as compromised supports can lead to catastrophic failure. Ascertain your inspection includes hidden spaces, like basements and attics, where moisture can linger undetected.
Identify the Source of Water
To effectively address water damage, you need to identify its source promptly.
Common culprits include leaky pipes, roof damage, and appliance malfunctions, which can often be detected through visual inspection or moisture meters.
Common Water Sources
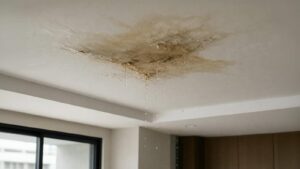
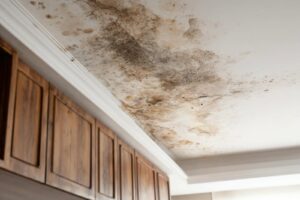
Water damage can originate from numerous common sources, and pinpointing the exact cause is essential for effective restoration.
Understanding where the water comes from helps you take appropriate action quickly. Here are four prevalent sources to take into account:
Rainwater Infiltration: Heavy rains can lead to leaks through roofs, windows, or basements.
Plumbing Failures: Broken pipes, leaky faucets, or malfunctioning appliances can cause significant water damage.
Flooding: Natural disasters or nearby water bodies overflowing can inundate properties.
Condensation: Poor ventilation may lead to moisture build-up, causing mold and structural damage.
Recognizing these sources empowers you to act swiftly, minimizing damage and ensuring a successful restoration process.
Quick Detection Methods
Detecting the source of water damage quickly is essential for effective restoration and can save you from further complications.
Start with moisture detection tools like hygrometers or moisture meters, which help identify hidden dampness in walls or floors. If you suspect a leak, utilize specialized leak detection equipment, including acoustic sensors or infrared cameras, to pinpoint the exact location.
Inspect areas prone to water intrusion, such as basements, bathrooms, and around appliances. Don’t overlook visual clues—stains, mold, or warped materials often signal underlying issues.
By promptly employing these methods, you can mitigate damage and ensure a swift restoration, safeguarding your home and peace of mind.
Remove Standing Water Immediately
Act swiftly to remove standing water, as every minute counts in preventing further damage to your property.
The key to effective water extraction lies in prompt action and proper techniques. Here’s how you can tackle this issue:
Assess the Situation: Identify the source of the water and confirm it’s stopped before proceeding.
Gather Equipment: Use powerful pumps, wet vacuums, and mops for efficient water extraction.
Remove Water: Start with the most affected areas, using your equipment to eliminate standing water.
Implement Moisture Control: After extraction, monitor humidity levels and use fans to facilitate drying.
Dry and Dehumidify the Affected Areas
Once you’ve removed standing water, the next step is to dry and dehumidify the affected areas to prevent mold growth and structural damage.
Start by using effective dehumidification methods, such as industrial-grade dehumidifiers and fans. These tools accelerate the drying process and help maintain ideal humidity levels.
Place the dehumidifiers strategically in the most damp areas, ensuring proper airflow. Regularly check the humidity levels with moisture monitoring devices to track progress and adjust your equipment as needed.
It’s essential to maintain a relative humidity below 60% to inhibit mold spores from thriving.
Don’t forget to open windows and doors when the weather permits, as this can enhance ventilation and aid in the drying process.
Assess and Repair Structural Damage
After the drying process, it’s essential to assess and repair any structural damage to confirm the integrity of your property.
You want to make certain that your home remains safe and secure, so follow these steps:
Conduct a Foundation Inspection: Check for cracks or shifts in your foundation, as these can indicate severe issues that need immediate attention.
Examine Load-Bearing Walls: Verify that your walls haven’t weakened; any damage here could compromise your entire structure.
Inspect Flooring and Ceilings: Look for sagging or warped areas, which might reveal underlying water damage that requires repair.
Utilize Effective Repair Techniques: Depending on the damage, methods like epoxy injections for cracks or reinforcement for weakened structures can restore strength.
Prevent Future Water Damage
To ensure your home remains protected from future water damage, it’s essential to implement proactive measures that address potential vulnerabilities.
Start with preventive maintenance; regularly inspect your plumbing for leaks, and make certain that your gutters and downspouts are clear to direct water away from your foundation.
Consider using water-resistant materials in areas prone to moisture, such as basements and bathrooms.
Installing waterproof membranes and utilizing mold-resistant paints can greatly reduce the risk of damage.
Additionally, invest in high-quality sump pumps and dehumidifiers to manage excess moisture effectively.
If you live in a flood-prone area, elevating critical appliances and using flood barriers can provide added protection.
Frequently Asked Questions
What Types of Water Damage Are Most Common in Homes?
Leaky pipes and flooded basements are the most common types of water damage in homes. They can cause significant structural issues and mold growth, so addressing them promptly is essential to maintaining your home’s integrity and safety.
How Can I Tell if Mold Is Present After Water Damage?
You can tell if mold’s present after water damage by conducting a thorough mold inspection, checking for musty odors, visible growth, and moisture. Implementing mold prevention methods ensures you maintain a healthy living environment and avoid future issues.
Will My Insurance Cover the Costs of Water Damage Restoration?
Your insurance may cover water damage restoration, but it depends on your insurance policies and coverage limits. Review your policy details, and consult your agent to understand what’s included and any potential exclusions.
How Long Does the Water Damage Restoration Process Typically Take?
The restoration timeline varies, typically taking days to weeks. You’ll see quick-drying techniques employed to minimize damage, but full restoration might require additional time depending on the severity and complexity of the situation.
Can I Handle Water Damage Restoration on My Own?
You can attempt DIY restoration if you’re knowledgeable, but prioritize safety precautions. Ensure you wear protective gear, assess structural integrity, and understand moisture removal techniques to prevent further damage and health risks. Professional help is often advisable.
Summary
In the face of water damage, don’t let the situation dampen your spirits. By acting swiftly and following these seven essential tips, you can turn a potential disaster into a manageable challenge. Prioritize safety and thoroughness, ensuring your property is not just restored but fortified against future mishaps. With the right approach, you’ll recover and enhance the resilience of your space, transforming adversity into opportunity. Stay proactive, and your property will thank you for it.