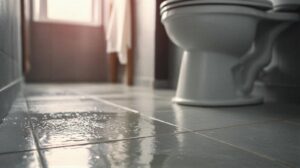
It’s interesting how a routine sewage backup can quickly turn into a major cleanup task. When you find yourself in this situation, understanding the steps is essential for an effective response. You’ll need to assess damage, ensure safety, and remove contaminated materials. Each step plays an important role in restoring operations and preventing future issues. But what comes next, and how can you secure a thorough and efficient process?
Key Takeaways
- Conduct a thorough damage assessment to identify any affected systems or data after the backup process.
- Remove contaminated materials by identifying and properly disposing of any debris or hazardous substances found during the assessment.
- Clean and disinfect the area using appropriate cleaning supplies and methods to ensure a safe environment.
- Evaluate the root causes of any issues that arose to implement effective restoration and prevention strategies.
- Educate your team on best practices for handling equipment and establish a robust backup protocol with regular testing.
Assessing the Damage
After performing a backup, you need to assess the damage to determine the next steps in your cleanup process.
Start by conducting a thorough damage assessment. Identify affected areas and evaluate the extent of the impact on your system. Document all findings meticulously; this will be essential for future reference and accountability.
Next, perform an impact evaluation to understand how the damage affects your operations.
Prioritize the most vital systems and data that require immediate attention. Establish a timeline for recovery, considering both resources and personnel available.
Engage with your team to share insights and gather additional perspectives; collaboration often uncovers aspects you might overlook.
Safety Precautions
With a clear understanding of the damage and its impact on your operations, prioritizing safety precautions becomes essential.
Begin by conducting a thorough hazard assessment to identify potential risks in the affected area. Confirm you’ve got the right personal protective equipment (PPE) ready—this includes gloves, goggles, and masks tailored to the specific hazards you might encounter.
Remember, your safety and that of your team is paramount.
Communicate the importance of adhering to safety protocols to everyone involved in the cleanup process. Establish clear guidelines and confirm that everyone understands their roles in maintaining a safe environment.
Regularly check and maintain your PPE throughout the cleanup to confirm its effectiveness.
Removing Contaminated Materials
Once you’ve confirmed safety measures are in place, it’s vital to begin removing contaminated materials promptly to minimize further risks.
Start by identifying all contaminated debris, such as damaged building materials, personal items, or any substances that may pose health hazards. Use appropriate personal protective equipment (PPE) while handling these materials to ensure your safety.
Next, separate the contaminated debris into designated containers for hazardous disposal. Label these containers clearly to avoid confusion and ensure compliance with local regulations.
It’s important to follow proper disposal protocols to prevent environmental contamination and uphold community safety.
After removing the contaminated materials, verify that the area is clear and safe for further cleaning.
Cleaning and Disinfecting the Area
Before you begin cleaning and disinfecting the area, make sure you’ve removed all contaminated materials thoroughly.
Gather your cleaning supplies, confirming they’re appropriate for the surfaces you’ll be treating. Use a vacuum or a damp cloth to eliminate any remaining debris.
Next, apply your chosen disinfecting methods. For hard surfaces, consider using a bleach solution or EPA-approved disinfectant. Follow the manufacturer’s instructions for dilution rates and contact times to maximize efficacy.
Don’t forget high-touch areas like doorknobs and light switches; these require special attention.
For fabrics, verify you’re using an appropriate cleaner that penetrates fibers effectively. If possible, wash items in hot water to further eliminate pathogens.
Once you’ve disinfected, allow surfaces to air dry to confirm the effectiveness of the disinfectant.
Observing these steps promotes a hygienic environment and fosters a sense of community health and safety.
Restoring and Preventing Future Issues
As you work to restore the area after cleanup, focus on addressing any underlying issues that contributed to the contamination in the first place. Start by evaluating the root causes, whether they’re related to improper storage, equipment failure, or environmental factors. This meticulous approach ensures a solid foundation for data recovery efforts.
Next, implement solutions tailored to prevent future issues. Consider upgrading your storage systems or enhancing your regular maintenance schedules. Educate your team about best practices in handling equipment and materials to foster a culture of safety and responsibility.
Additionally, establish a robust backup protocol that includes regular data verification and testing. This proactive measure safeguards your information and minimizes the risk of future setbacks.
Frequently Asked Questions
How Long Does the Cleanup Process Usually Take?
The cleanup duration typically ranges from a few hours to a couple of days, depending on the data volume and system performance. Time estimates vary, but planning for potential delays enures a smoother process.
What Protective Gear Is Recommended During Cleanup?
For safe, successful cleanup, you’ll want protective gloves and safety goggles. These essential components create a barrier against potential hazards, ensuring you stay safeguarded while efficiently handling the cleanup process. Prioritize your protection!
Can I Handle the Cleanup Myself?
Yes, you can handle the cleanup yourself. Employ effective cleanup techniques and follow proper DIY cleanup protocols. Make certain you’re equipped with the right tools and protective gear to maintain safety throughout the process.
What Types of Chemicals Should I Avoid Using?
Avoid harmful solvents like benzene and acetone; they can damage surfaces and your health. Instead, opt for safe alternatives like vinegar or baking soda. Just as a gardener chooses nurturing soil, choose wisely for a successful cleanup.
How Can I Safely Dispose of Contaminated Materials?
You should separate contaminated waste into designated containers, label them clearly, and follow local regulations for safe disposal. Always consult your area’s waste management guidelines to ensure you’re properly handling and disposing of hazardous materials.
Wrap-Up
In cleanup, think of your approach like a well-tuned machine; each step plays an essential role in restoring functionality. Just as a mechanic wouldn’t skip inspecting a critical part, you shouldn’t overlook any phase of the process. By methodically evaluating damage, ensuring safety, and cleaning thoroughly, you prevent future breakdowns. Remember, a proactive strategy today saves you from costly repairs tomorrow, much like maintaining your vehicle keeps it running smoothly for years.