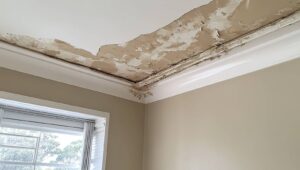
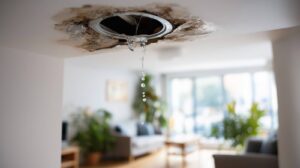
When water stains spread across your ceiling like a slow storm cloud, you need to act fast. To Repair Ceiling Leak damage properly, first stop the leak and cut power to any wet fixtures, then dry the area with fans and a dehumidifier. Next, remove damaged drywall and insulation before mold can take hold. After that, you can patch stains, cracks, and sagging, but identifying and fixing the original source is the final step that keeps the problem from coming back.
Key Takeaways
- Stop the leak at the source, then avoid wet outlets, sagging drywall, and other safety hazards.
- Dry the ceiling thoroughly with fans, open windows, and a dehumidifier to prevent hidden moisture damage.
- Remove any damaged drywall and soaked insulation to stop mold and further spreading.
- Repair stains, cracks, and sagging with primer, joint tape, compound, and sanding.
- Prevent future leaks by inspecting the roof, flashing, gutters, and attic ventilation regularly.
Stop the Leak and Check Safety
Before you do anything else, stop the water source if you can safely reach it, then protect the area below the leak.
Turn off the nearby valve, or shut off the main supply if needed.
Next, run a quick leak detection check: trace drips, listen for running water, and inspect fixtures, pipes, and the attic above.
If you see sagging drywall, active electrical hazards, or heavy water flow, keep your distance and call a professional.
Take basic safety precautions by wearing non-slip shoes and avoiding wet outlets or switches.
Place a bucket under the drip and move valuables away.
You’re not dealing with this alone; many homeowners face the same issue, and a careful first response helps you regain control.
Dry Out Ceiling Leak Damage
Once the leak is under control, dry the ceiling damage fast to limit staining, mold growth, and structural weakening.
Start by opening windows and running fans to move air across the wet area. Use moisture detection to find hidden damp spots in seams, corners, and around fixtures, because surface dryness can be misleading.
If you have a dehumidifier, place it nearby and keep it running until readings drop.
Switch between drying techniques: gentle airflow, controlled heat, and low humidity work best together.
Check the ceiling every few hours, and wipe any new condensation right away.
Stay patient and methodical; you’re helping your home recover safely.
When the area feels dry and readings stay stable, you can move forward with confidence.
Remove Damaged Drywall and Insulation
Now cut out the damaged drywall and insulation so trapped moisture doesn’t keep spreading.
Put on gloves, eye protection, and a mask, then mark the wet area with a pencil. Use a utility knife to score the drywall, and remove it in clean sections with a drywall saw or pry bar.
Pull out any soaked insulation nearby, because damaged materials can hide moisture and slow drying. Place everything in heavy-duty bags or contractor bins as you work.
Check the cavity for darkened framing, loose paper, or damp backing, and remove only what’s affected. Choose disposal methods that follow your local waste rules, especially for wet insulation.
Keep the area open and tidy so you and your home crew can move confidently into the next repair step together.
Repair Water Stains, Cracks, and Sagging
After the ceiling cavity dries completely, you can repair the visible damage with a methodical patch-and-finish process.
First, seal any yellowed areas with a stain-blocking primer; that’s one of the best water stain remedies.
Next, open hairline fractures slightly with a utility knife, then embed joint tape in setting compound for durable ceiling crack solutions.
Build thin coats, feathering each layer beyond the repair, and let every coat cure before sanding.
If the surface still dips, spread a lightweight topping compound to restore the plane, then sand smooth with a fine grit.
Finally, wipe away dust and prime the patched area so it blends with the surrounding ceiling.
You’ve got this, and careful work will make the repair feel like it belongs.
Prevent Future Ceiling Leaks
To keep the repair from coming back, inspect the roof, flashing, gutters, and attic ventilation so you can catch the source before it saturates the ceiling again.
Next, make preventative maintenance part of your routine: clean gutters seasonally, seal exposed joints, and replace cracked shingles right away.
Schedule roofing inspections after storms and once a year to spot lifted flashing or soft decking before leaks spread.
Picture a ladder against a dry wall, with you clearing pine needles from a silver gutter.
Imagine daylight slicing through the attic, showing a vent fan moving humid air out.
See a roofer pressing new sealant around a vent pipe while you document each fix.
These steps keep your home safer, and you’re not handling it alone.
Frequently Asked Questions
How Can I Tell if the Ceiling Needs Structural Repair?
You’ll need structural repair if you see sagging, cracks, or repeated stains. Start a leak assessment, then inspect framing for softness, movement, or mold. If structural integrity’s uncertain, call a pro quickly.
Should I File an Insurance Claim for Ceiling Water Damage?
Yes, you should file a claim if your insurance coverage applies. First, document the soft spill’s trail, then get a damage assessment. You’ll protect your place, stay informed, and find your footing together.
How Do I Find Hidden Mold After a Ceiling Leak?
You’ll find hidden mold by doing a moisture assessment, then using mold detection tools like a meter and flashlight. Check attic spaces, insulation, and drywall edges, and you’ll catch hidden growth early, safely.
Can I Paint Over a Repaired Water Stain Immediately?
No, you shouldn’t paint immediately. You need proper paint preparation: let the repair fully dry, sand smooth, then apply stain blocking primer. Once it cures, you can paint confidently and blend the ceiling neatly.
When Should I Call a Professional for Ceiling Leak Damage?
Call a professional when you can’t find the source, the leak’s active, or damage spreads. You’ll get leak detection, safe repairs, and maintenance tips. First, shut off water, document damage, then contact a licensed contractor.
Wrap-Up
By now, you’ve stopped the leak, dried the ceiling, and removed any damaged material. Next, you’ve sealed stains, reinforced cracks with joint tape, and smoothed the surface with thin compound coats. After sanding and priming, your ceiling should look clean and solid again. Finally, keep an eye on plumbing, roofing, and ventilation so moisture doesn’t return. If you spot trouble later, address it fast—don’t wait like it’s a slow-moving telegram.