When a toilet decides to misbehave, it’s essential to handle the aftermath with care and precision. You must act quickly to mitigate damage and ensure safety. Start by evaluating the situation and taking appropriate steps to address the toilet overflow. Understanding what to do next can save you time, money, and stress. Are you prepared to tackle the clean-up and prevent future incidents?
Key Takeaways
- Turn off the water supply by locating and rotating the shut-off valve clockwise to stop further overflow.
- Remove excess water using towels and a wet/dry vacuum to prevent water damage and mold growth.
- Clean and disinfect the affected area with hot, soapy water and appropriate disinfectants to eliminate contaminants.
- Identify the source of the overflow by checking for clogs, faulty valves, or high water levels in the toilet tank.
- Consider contacting a water damage restoration professional for thorough assessment and assistance with cleanup and insurance claims.
Assess the Situation
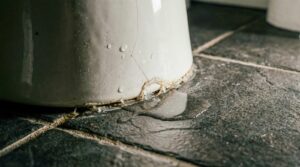
When a toilet overflows, it’s essential to assess the situation quickly to prevent further damage.
Start by identifying the overflow causes, which can include a clogged drain, a malfunctioning float mechanism, or a broken flapper valve. Understanding the root problem allows you to address it effectively.
Next, conduct a damage assessment. Check the surrounding area for water pooling and note any potential damage to flooring, walls, or nearby fixtures.
If the overflow has reached electrical outlets, exercise caution to avoid risks. It’s also wise to inspect the toilet itself for cracks or other issues that could lead to more leaks.
Documenting the extent of the damage helps you communicate with professionals if needed.
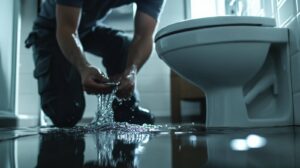
Turn Off the Water Supply
First, locate the shut-off valve, typically found on the wall behind the toilet.
Turn it off by rotating it clockwise to stop the water flow.
This step is essential to prevent further water damage.
Locate the Shut-Off Valve
To prevent further flooding, quickly locate the shut-off valve and turn off the water supply. Understanding the shut-off placement is essential for effective management of plumbing emergencies.
Here’s what to take into account:
- Identify Valve Types: There are typically two types of shut-off valves—compression and ball valves. Familiarize yourself with both for easier handling.
- Location: The valve is usually found near the base of the toilet or along the wall. If you’re unsure, check the manufacturer’s guide for specific placement.
- Accessibility: Verify the valve is easily accessible for future emergencies. Regularly check its functionality to avoid complications when you need it most.
Turn Off Clockwise
After locating the shut-off valve, you’ll need to turn it off by rotating it clockwise. This action halts the water supply, preventing further overflow and minimizing damage.
It’s essential to know that shut-off valves can be located behind the toilet or near the floor; familiarize yourself with your plumbing setup for effective toilet maintenance. If the valve is stiff, apply gentle pressure and avoid forcing it, as this could cause damage.
Remember, being proactive with plumbing tips can save you from future emergencies. Once the water supply is off, you can proceed to address the overflow safely.
Ensuring you’re equipped with this knowledge fosters a sense of belonging within your community of responsible homeowners.
Prevent Further Water Damage
As soon as you’ve turned off the water supply, it’s important to act quickly to prevent further water damage. Delaying action can worsen the situation and complicate any potential insurance claims.
Here’s what you should do next:
- Remove Standing Water: Use a wet/dry vacuum or towels to eliminate any standing water. This helps minimize water damage and mold growth.
- Dry the Area: Set up fans and dehumidifiers to thoroughly dry the affected area. This is vital for preventing long-term damage.
- Check for Structural Damage: Inspect walls, floors, and ceilings for any signs of water damage. Document any issues, as this can aid your insurance claims process later.
Remove Excess Water
After turning off the water supply, it’s essential to remove excess water promptly to prevent further damage.
Gather necessary supplies like towels and a wet vacuum to efficiently absorb and remove the water.
Using towels effectively will help absorb smaller amounts, while a wet vacuum can tackle larger spills quickly.
Gather Necessary Supplies
To effectively manage a toilet overflow, you’ll need a few essential supplies to remove excess water quickly.
Having the right toilet supplies on hand expedites cleanup and ensures you’re prepared for any situation.
Here’s a quick list of what you should gather:
- Wet/dry vacuum – This is your best tool for sucking up large quantities of water efficiently.
- Mop and bucket – For any residual water, mops help absorb and contain spills.
- Cleaning essentials – Include disinfectant, gloves, and towels to sanitize the area and maintain hygiene.
Use Towels Effectively
Once you’ve gathered the necessary supplies, it’s time to tackle the overflowing water.
Start by selecting the right towel types—absorbent cotton towels or microfiber cloths work best for soaking up excess water. Avoid using towels meant for decorative purposes as they may not absorb effectively.
Begin by laying the towels flat on the wet areas, allowing them to soak up as much water as possible. After a few moments, press down firmly to encourage absorption.
Rotate towels as they become saturated and replace them from your towel storage when needed.
Once you’ve removed the bulk of the water, dispose of the wet towels properly, and ensure the area dries completely to prevent mold growth.
Employ Wet Vacuum
Using a wet vacuum is an efficient way to remove excess water after a toilet overflow, particularly in large areas where towels alone can’t handle the volume.
Wet vacuums come in various types, including portable and industrial models, allowing you to choose one that suits your needs.
Here’s how to use one safely:
- Choose the Right Wet Vacuum Type: Select a model with adequate capacity for your space.
- Ensure Wet Vacuum Safety: Before operation, unplug any electrical devices nearby to prevent shocks.
- Follow Manufacturer Instructions: Adhere to guidelines for effective use and maintenance.
Clean and Disinfect the Area
Begin by removing any standing water and debris in the affected area to prevent further damage and reduce the risk of contamination.
Use a wet vacuum or mop to extract the water efficiently. Once the area is dry, employ effective cleaning techniques such as scrubbing surfaces with hot, soapy water to remove any residual waste and dirt.
Next, select appropriate disinfecting agents. Products containing bleach, hydrogen peroxide, or quaternary ammonium compounds are ideal for killing harmful bacteria and viruses.
Apply these agents according to the manufacturer’s instructions, ensuring you cover all affected surfaces thoroughly. Allow the disinfectant to sit for the recommended duration to maximize its effectiveness.
Finally, ventilate the space by opening windows or using fans to help dissipate any lingering odors and speed up drying.
This careful approach ensures a clean, safe environment, allowing you to regain your peace of mind.
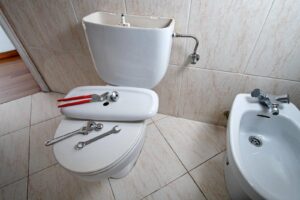
Identify the Source of the Overflow
After ensuring the area is clean and disinfected, the next step is to identify the source of the overflow.
Understanding the overflow causes is vital for effective toilet maintenance and preventing future incidents. Here are three common sources to investigate:
- Clogged Drainage: Check if there’s a blockage in the toilet or plumbing lines. Foreign objects or excess waste can lead to backups.
- Faulty Flapper: Inspect the flapper valve inside the tank. If it’s damaged or not sealing properly, water can continuously flow into the bowl.
- High Water Level: Verify the float mechanism is functioning correctly. If the water level is set too high, it can spill over the tank rim.
Check for Damage to Surrounding Areas
Checking for damage to surrounding areas is essential after a toilet overflow. Start by inspecting the floor and nearby walls for water stains, which can indicate prolonged exposure to moisture. These stains often signal that water has seeped into the materials, potentially compromising their integrity.
Next, examine any cabinetry or baseboards close to the toilet. If you notice discoloration or warping, it’s a sign that water has penetrated those surfaces as well.
Additionally, keep an eye out for mold growth, which can develop in damp environments within 24 to 48 hours. Look for black, green, or white patches in hidden corners or behind fixtures.
If you detect any signs of mold, it’s imperative to address it promptly to prevent health risks. By thoroughly checking for damage and acting quickly, you can help ensure a safe and healthy environment in your home.
Contact a Water Damage Restoration Professional
Once you’ve assessed the damage from the overflow, contacting a water damage restoration professional is essential to mitigate further issues.
These experts can help you navigate the complexities of water damage, ensuring your home is safe and sound. Here are three key reasons to reach out:
- Expert Assessment: Restoration professionals have the training to identify hidden damage that you might miss, from structural issues to mold risks.
- Advanced Equipment: They utilize specialized tools and techniques to efficiently remove water and dry out affected areas, minimizing long-term impact.
- Insurance Guidance: Many restoration professionals can assist with insurance claims, helping you understand your coverage and streamline the process.
Prevent Future Overflows
To prevent future toilet overflows, you should implement a few essential maintenance practices.
First, regularly check your toilet’s parts, including the flapper, fill valve, and float mechanism. Ensuring these components function properly can considerably reduce overflow risks.
Next, be mindful of what goes down the toilet; avoid flushing non-degradable items like wipes or feminine products.
Additionally, consider scheduling routine plumbing inspections. A professional can identify hidden issues, such as clogs or leaks, before they escalate into considerable problems.
You might also want to inspect your toilet’s water level. It should be about an inch below the top of the overflow tube. If it’s too high, adjust the float to prevent potential overflows.
Frequently Asked Questions
How Can I Tell if the Overflow Is a Plumbing Issue?
You can tell it’s a plumbing issue by checking for plumbing signs like persistent leaks, slow drains, or gurgling sounds. These overflow causes often indicate deeper problems requiring professional assessment to prevent further damage.
What Materials Are Safe for Cleaning After a Toilet Overflow?
You’ll want to use safe cleaning materials like bleach or hydrogen peroxide for effective disinfectants. Always wear gloves and ensure proper ventilation while cleaning to prevent exposure to harmful bacteria and odors from the overflow.
Can I Use Bleach to Disinfect the Area Effectively?
Yes, you can use bleach to disinfect surfaces effectively. Its effectiveness against bacteria and viruses makes it a strong choice. Just ensure proper ventilation and follow dilution guidelines for safe application while cleaning the area.
How Long Does It Take for Water Damage to Manifest?
Water damage can manifest within 24 to 48 hours. You’ll notice signs of dampness like discoloration, musty odors, or peeling paint. Addressing issues promptly helps prevent further damage and maintains a healthy environment.
Are There Specific Tools Needed for Cleanup After an Overflow?
For effective cleanup, you’ll need tools like a wet/dry vacuum and mops, plus safety gear such as gloves and masks. Remember, many homes experience water damage, so being prepared is essential for you.
Review
After a toilet overflow, you must act quickly and methodically. Turn off the water supply, remove excess water, and clean the area to prevent mold. Identify the overflow’s source, check for damage, and consider contacting a professional for help. Addressing the situation promptly and putting preventive measures in place helps protect your home and gives you peace of mind, so a small mishap doesn’t lead to bigger problems later.