
Ceiling water damage repair means stopping the water at its source, drying the ceiling and the cavity above it, replacing drywall and insulation that cannot be saved, and only then patching, priming and repainting. The order matters. A ceiling that is painted before it is dry, or before the leak is fixed, will stain again and can grow mold above the paint. This guide covers what to do in the first hour, how to tell whether a ceiling can be dried or has to come down, what repairs cost, and what homeowners insurance usually covers.
Key Takeaways
- Fix the source first. A ceiling stain is the symptom. The roof, pipe, fixture or appliance above it is the problem.
- The EPA says to dry water-damaged areas and items within 24 to 48 hours to prevent mold growth, so the clock starts when the leak does.
- EPA guidance for water-damaged building materials is to discard and replace wet ceiling tiles and insulation. Drywall may be dried in place only if there is no obvious swelling and the seams are intact.
- HomeAdvisor puts the average ceiling repair at $1,077, with most homeowners paying $438 to $1,718, and water-damaged ceilings at $45 to $55 per square foot plus the cost of fixing the source (updated June 2026).
- Standard homeowners insurance generally covers burst pipes, wind driven rain and ice dam damage, according to the Insurance Information Institute. Seepage and maintenance problems are generally not covered.
What Should You Do First When Water Comes Through the Ceiling?
Protect people first, then the room, then the ceiling. These steps apply whether the water is a slow drip or a steady stream.
- Stay clear of electricity. Water follows wiring and collects in light fixtures and ceiling fans. If you can reach the breaker panel from a dry location, turn off power to the affected rooms. The CDC warns never to turn power on or off yourself, or use an electric tool or appliance, while standing in water.
- Stop the water if it is plumbing. If the leak is under a bathroom, kitchen, laundry or water heater, shut off the fixture valve or the main water shut-off valve. The Insurance Information Institute recommends that every household know where the main shut-off is before it is needed.
- Contain it. Move furniture, rugs and electronics out from under the wet area. Put down plastic sheeting and buckets.
- Relieve a bulge carefully. A ceiling that is sagging like a blister is holding water. Restoration technicians often drain a bulge through a small hole at its lowest point, into a bucket, so the water comes out in one controlled place instead of spreading across the drywall. Stay out from under a large or heavily sagging section. It can drop without warning.
- Document everything. Photograph and video the ceiling, the source if you can see it, and any damaged belongings before you move or throw anything away. Your insurer will ask for it.
- Start drying. Run fans and a dehumidifier once the electrical risk is handled. The CDC advises using fans and dehumidifiers to remove excess moisture.
What Causes Ceiling Water Damage?
What is directly above the stain usually tells you where to look.
- Roof leaks. Missing or damaged shingles, failed flashing around chimneys, vents and skylights, and hail damage. Roof leaks tend to appear or worsen after rain or snowmelt, and the stain is often some distance from the entry point because water runs along rafters before it drops.
- Ice dams. On the Front Range, snow that melts and refreezes at the roof edge can push water back under the shingles and into the ceiling below.
- Plumbing above the ceiling. Supply lines, drain lines, toilet seals, tub and shower drains, and failed caulk or grout in an upstairs bathroom. These leaks show up regardless of the weather, and often get worse when a fixture is used.
- Appliances and HVAC. Water heaters, washing machine hoses, and clogged condensate lines or overflowing drain pans from attic air handlers.
- Condensation. Poor attic or bathroom ventilation can leave moisture on the back of the ceiling with no leak at all.
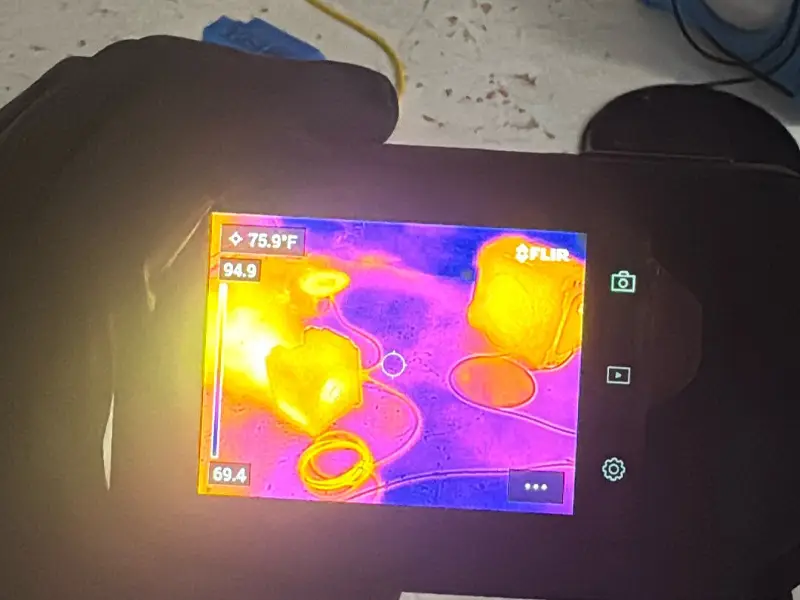
If the source is not obvious, professional leak detection with moisture meters and thermal imaging can find it without opening up the whole ceiling.
How Serious Is Water Damage on a Ceiling?

It ranges from cosmetic to dangerous, and the surface does not always tell you which. A small, dry, old stain from a leak that has already been fixed may need only primer and paint. A ceiling that is actively wet is a different situation, because the damage you can see is usually smaller than the damage above it.
Signs that the problem is more than cosmetic:
- The ceiling is sagging, bowing or bulging
- The drywall feels soft or crumbles when pressed
- Seams and tape are lifting, or paint is bubbling and peeling
- The stain grows, or returns after it rains or after someone showers upstairs
- There is a musty odor, or visible mold
- Water is dripping from or near a light fixture, fan or smoke detector
The EPA notes that mold may be hidden on the back side of drywall and on the top side of ceiling tiles. A ceiling can look acceptable from below while the side you cannot see stays wet.
Does the Ceiling Need to Be Replaced After Water Damage?
Sometimes. It depends on the material, how wet it got, and how long it stayed wet. The EPA’s guidance on cleaning up water-damaged building materials within the first 48 hours is specific:
- Ceiling tiles: discard and replace.
- Fiberglass and cellulose insulation: discard and replace.
- Drywall (wallboard): may be dried in place if there is no obvious swelling and the seams are intact. If not, remove, discard and replace, and ventilate the cavity if possible.
In practice, a small area of drywall that got wet from clean water and was dried quickly can often stay. Drywall that has sagged, swelled, gone soft or pulled loose from its fasteners has lost its strength and should be cut out. Wet insulation sitting on top of the drywall holds water against it, which is why a ceiling with soaked insulation above it usually has to be opened even when the face looks fine.
Water from a contaminated source, such as an overflowing toilet or a drain line on the floor above, is handled more conservatively. Porous materials that absorbed it are removed, not dried.
How Is a Water-Damaged Ceiling Repaired, Step by Step?
- Fix the source. Repair the roof, pipe, fixture or appliance and confirm the leak has stopped. Nothing below this step lasts if the water comes back.
- Check the extent. Moisture meters and thermal imaging show how far the water travelled across the ceiling and down into the walls. The wet area is almost always larger than the stain.
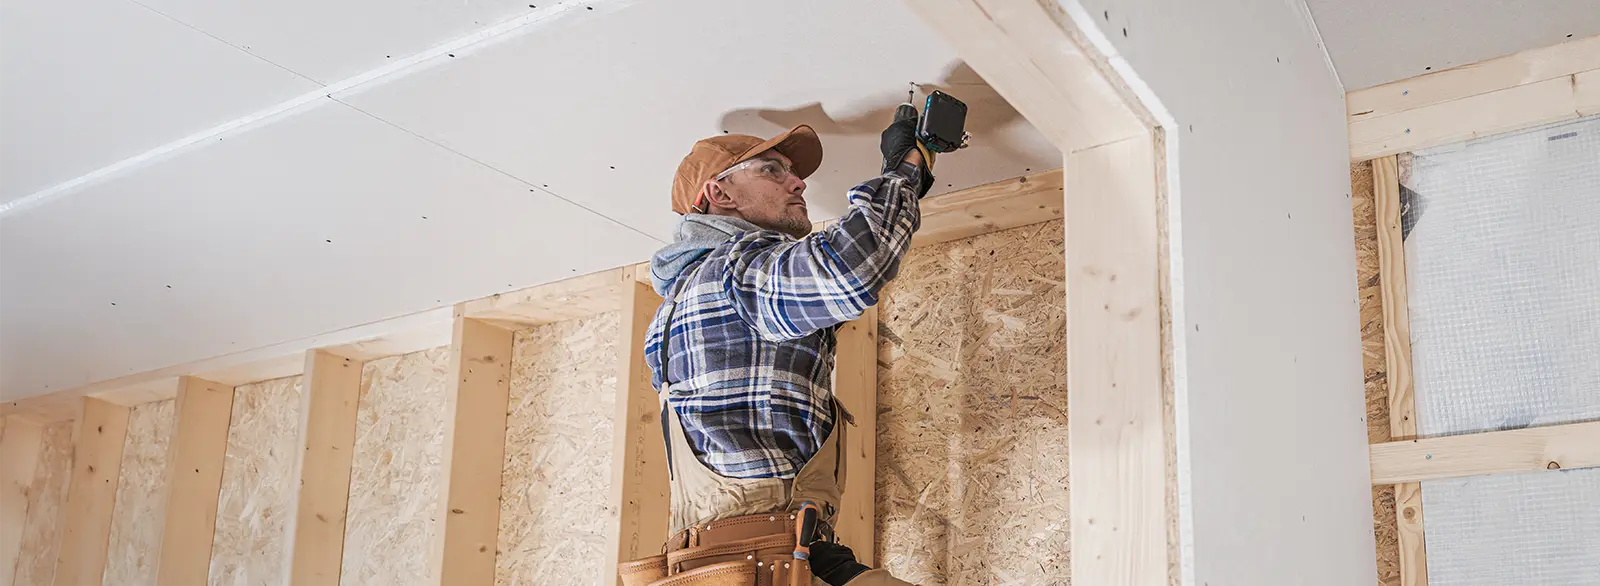
- Remove what cannot be saved. Cut out swollen or sagging drywall back to the nearest framing, and pull out wet insulation. Cutting to the center of a joist gives the new piece something to fasten to.
- Dry the cavity. Air movers and dehumidifiers run until the framing and remaining drywall read dry. Opening the ceiling speeds this up considerably, because air can reach both sides. The EPA recommends keeping indoor humidity below 60 percent, ideally between 30 and 50 percent.
- Deal with any mold. Clean it and dry the surface before closing anything up. The EPA is direct on this point: do not paint or caulk moldy surfaces.
- Replace insulation and drywall. Fit new insulation, then fasten a new drywall patch, tape the joints and apply joint compound in thin coats, sanding between them.
- Prime with a stain blocker, then paint. Water stains bleed through ordinary latex paint. A stain-blocking primer over the repaired and stained area comes first. Painting the whole ceiling, corner to corner, usually hides the repair better than spot painting.
- Match the texture. Popcorn, knockdown and other textured ceilings need the texture reapplied over the patch before painting.
If a larger flood has left standing water on the floor below, removal comes before any of this. Our guide to water extraction covers that stage.
How Do You Prevent Mold After a Ceiling Leak?
Speed and dryness. The EPA says it is important to dry water-damaged areas and items within 24 to 48 hours to prevent mold growth. For a ceiling, that means the cavity above it has to dry in that window too, which rarely happens on its own once insulation is wet.
- Get air moving and a dehumidifier running the same day
- Remove wet insulation instead of waiting for it to dry
- Do not seal the ceiling back up, or paint it, until moisture readings are back to normal
- Watch the area for several weeks for a returning stain or a musty smell
The EPA says that if a moldy area is less than about 10 square feet, roughly a 3 foot by 3 foot patch, in most cases you can handle the job yourself. Larger areas, or mold above a ceiling you cannot fully see, are a job for a professional. See our mold remediation service if growth has already started.
How Much Does Ceiling Water Damage Repair Cost?
According to HomeAdvisor’s cost guides (both updated June 17, 2026):
- The average ceiling repair costs $1,077, with a typical range of $438 to $1,718 and a full range of $150 to $4,500.
- A water-damaged ceiling costs $45 to $55 per square foot to repair, plus the cost of fixing the source of the leak.
- A patch of about 4 square feet runs $180 to $220 in drywall, $270 to $330 in plaster and lath, and $300 to $370 in a popcorn ceiling.
- If the framing is affected, repairing a ceiling joist costs $150 to $750.
- Water damage restoration overall, including drying and cleanup beyond the ceiling itself, averages $3,868, with a typical range of $1,383 to $6,369.
These are national figures, not quotes. The things that move the price most are the size of the wet area, whether the insulation and framing are involved, the ceiling material and texture, how contaminated the water was, and whether mold has to be remediated. Fixing the roof or plumbing that caused the leak is a separate cost.
Will Homeowners Insurance Cover Water Damage to a Ceiling?
It depends on the cause, not on the ceiling. The Insurance Information Institute says homeowners and renters insurance provides coverage for burst pipes, wind driven rain and damage resulting from ice dams on your roof, and that water coming from the top down, such as rainfall and burst sprinklers, is covered by a standard homeowners policy.
The same source is clear about the limits. Water seepage and problems that come from a lack of maintenance are generally not covered, and flood damage is not covered by standard homeowners insurance. A pipe that bursts is typically treated differently from a fitting that has dripped for months.
Policies differ, so read yours and call your agent or insurer early. To support a claim:
- Report the damage promptly
- Keep the photos and video you took before cleanup
- Take reasonable steps to stop further damage, and keep the receipts
- Hold on to damaged materials until the adjuster has seen them, where that is safe
- Ask for a written moisture report and scope of work from your restoration contractor
When Should You Call a Water Damage Professional?
A small, clean-water stain from a leak that is already fixed is a reasonable DIY repair. Call a professional when:
- The ceiling is sagging, or any part of it has come down
- Water has reached light fixtures, wiring or the electrical panel
- You cannot find or stop the source
- Insulation above the ceiling is wet
- The water came from a toilet, drain or sewer line
- There is mold, a musty odor, or the ceiling has been wet for more than a day or two
- More than one room or more than one floor is affected
- You plan to file an insurance claim and need the damage documented
Multi-family, HOA, apartment and hotel properties are commercial work, where a ceiling leak often involves more than one unit and more than one responsible party. See our commercial restoration service.
How Do You Prevent Future Ceiling Leaks?
- Inspect the roof for missing, damaged and aging shingles and make repairs, as the Insurance Information Institute recommends. In Colorado, check after every hailstorm.
- Keep gutters clear so water flows away from the house.
- Check the hoses on water heaters, dishwashers, washing machines and refrigerator icemakers every year. The Insurance Information Institute advises replacing them all every five to seven years.
- Recaulk tubs and showers when the seal cracks or pulls away.
- Have attic HVAC drain pans and condensate lines checked at each seasonal service.
- Run bathroom exhaust fans during and after showers, and make sure they vent outdoors, not into the attic.
- Look at your ceilings and attic a few times a year. A stain caught early is a far smaller repair.
Getting Help With Ceiling Water Damage in Denver
Prime Restore Solutions LLC is an IICRC Certified Firm serving Denver and the Front Range, available 24/7. Our crews find the source, map the moisture, dry the structure, and handle the rebuild from drywall to paint. For a ceiling leak that is active right now, call (720) 790-6056.
Learn more about our water damage restoration service, storm damage restoration for roof leaks after hail and wind, and our Denver damage restoration team.
Frequently Asked Questions
Can a ceiling leak affect electrical wiring?
Yes. Water travels along wiring and collects in fixture boxes, recessed lights and ceiling fans. Turn off power to the affected area from a dry location and leave it off. The CDC advises having an electrician check the electrical system before turning the power on again.
Can I paint over a water stain on the ceiling?
Only after the leak is fixed and the ceiling is fully dry. Use a stain-blocking primer first, because the stain will bleed through ordinary paint. If there is mold, the EPA says to clean it up and dry the surface before painting.
Can mold grow in a ceiling after a small leak?
Yes. The size of the leak matters less than how long the materials stay wet. The EPA’s guidance is to dry water-damaged areas within 24 to 48 hours. Wet insulation above the ceiling can hold moisture well past that even when the surface feels dry.
How long does ceiling water damage repair take?
It depends on drying, not on the patching. The drywall, taping and painting follow a predictable sequence, but none of it should start until moisture readings in the framing and surrounding drywall are back to normal. Closing a ceiling early is the most common reason a repair fails.
Can I stay in the room during repairs?
Stay out from under any sagging section until it has been removed or supported, and keep the power off to wet fixtures. Once the ceiling is opened, safe and drying, most rooms can be used around the equipment. If there is mold or the water was contaminated, keep the room closed off until cleanup is complete.
Sources
- U.S. Environmental Protection Agency, A Brief Guide to Mold, Moisture and Your Home
- U.S. Environmental Protection Agency, Mold Remediation in Schools and Commercial Buildings, Table 1: Water Damage Cleanup and Mold Prevention
- Centers for Disease Control and Prevention, Safety Guidelines: Reentering Your Flooded Home
- Insurance Information Institute, How to Protect Your Home From Water Damage
- HomeAdvisor, Ceiling Repair Cost (updated June 17, 2026)
- HomeAdvisor, Water Damage Restoration Cost (updated June 17, 2026)